Prepare to unleash your creativity with our delightful guide on creating personalized gift tags using clear stamps! Custom gift tags are a charming way to add a personal touch to any present, and they can easily be made right at home. With just a few steps, you'll transform simple tags into treasured keepsakes that reflect the recipient's personality and your artistic flair.
In this guide, we’ll walk you through the process of using our Letters, Numbers, & Symbols Clear Stamp Set. You’ll discover how to make unique and stylish tags that stand out. So gather your supplies, roll up your sleeves, and get ready for a fun and inventive crafting session!

The Letters, Numbers, & Symbols Clear Stamp Set is a fantastic collection of 86 individual stamps that lets you personalize your creations with ease. Whether you want to spell out a name, add a playful date, or include fun symbols, this set offers an array of options to elevate your crafting. Ideal for gift tags, scrapbooking, or any paper project, these clear stamps are user-friendly and perfect for crafters of all levels. Let your imagination run wild as you create stunning and heartfelt designs that capture the essence of your gifts.
Choosing Your Materials
Creating personalized gift tags with your Letters, Numbers, & Symbols Clear Stamp Set (86 individual stamps) is an enjoyable and creative process that begins with selecting the right materials. High-quality cardstock is essential as it provides a sturdy base for your tags, ensuring they stand up well to embellishments and ink applications. Kraft paper, for example, adds a rustic charm, while smooth white or colored cardstock gives a more polished look. Choosing a thickness around 80lb to 100lb is recommended for durability.
In addition to cardstock, ink pads are crucial for the stamping process. Opt for pigment or dye-based inks that complement your color scheme and provide vibrant impressions. A few color choices might include classic black for timeless elegance, or bright shades for a pop of color. Furthermore, decorative items such as ribbons, washi tape, or even sequins can elevate the look of your gift tags. Ribbons can add a touch of elegance, while washi tape brings versatility and fun patterns to your designs. Prioritizing quality materials not only enhances the aesthetic appeal but also contributes to the overall polished finish of your personalized gift tags.
- High-quality cardstock (Kraft or colored)
- Recommended ink pads (pigment or dye-based)
- Decorative ribbons for embellishment
- Washi tape for added creativity
- Optional sequins for some sparkle
Design Planning
Creating personalized gift tags with a Letters, Numbers, & Symbols Clear Stamp Set (which includes 86 individual stamps) requires thoughtful design planning. Begin by sketching out your ideas on paper. This initial step will help you visualize how the various elements of your gift tags will come together. Consider the dimensions of your tags—standard sizes generally range from 2x3 inches to 4x6 inches. This basic layout will guide you in arranging your stamps effectively. Think about what messages or names you want to feature prominently on the tags. For example, you might want a recipient's name at the top and a heartfelt message below or a simple "To" and "From" arrangement on the tag.
Next, consider the color scheme that reflects the occasion and the recipient's personality. A vibrant color palette might suit a birthday celebration, while pastel hues could align better with a baby shower or wedding. Once you're settled on colors, look at the symbols you'll be using. The clear stamp set provides a lot of flexibility, so think about adding not just letters and numbers, but also festive symbols like stars, hearts, or holiday motifs that complement your theme. As you refine your sketches, remember to leave some blank space; a cluttered tag can be overwhelming. Here are some additional pointers to keep your design cohesive:
- Choose a focal point: Decide whether a letter or symbol will stand out.
- Balance your layout: Place significant elements evenly to attract the eye.
- Experiment with spacing: Open space can create a clean, polished look.
- Test different stamp arrangements: Move stamps around on your sketch before committing.
Stamping Techniques
Creating personalized gift tags with the Letters, Numbers, & Symbols Clear Stamp Set offers a unique and creative way to add a personal touch to your gifts. Mastering stamping techniques is key to achieving crisp, clean impressions that enhance your designs. Here’s a step-by-step guide that will elevate your stamping game.
Start by properly inking your stamps. Gently tap the stamp onto your ink pad to evenly coat the surface without over-inking. Excess ink can lead to blurry or smudged impressions. Aim for a light, consistent tap to distribute the ink evenly across the stamp. When positioning your stamp on the gift tag, hold it firmly in place to prevent any unintended shifts. Apply even and moderate pressure across the entire stamp as you press down onto the tag. Pressure is crucial; too little may result in incomplete impressions, while too much can cause ink to bleed. After firmly applying pressure for a few moments, gently lift the stamp away from the tag. Avoid dragging the stamp to maintain the integrity of your image and minimize smudging. If you do accidentally smudge, having some cleaner or a baby wipe on hand can help to fix minor errors.
- Choose high-quality ink pads that work well with clear stamps for best results.
- Practice on scrap paper before moving to your actual gift tags.
- Experiment with different pressures for varied effects.
- Use a stamping block to assist in even pressure application.
- Allow the ink to dry fully before handling to avoid smudges.
- Consider layering stamps for a more decorative touch.
- Testing color combinations can lead to exciting creative discoveries.
- Make sure to clean your stamps after use to prolong their life and maintain vibrant impressions.
- Store your stamps away from direct sunlight to prevent fading and damage.
- Use diverse patterns and fonts available in the stamp set to play with styles.
Spacing and Alignment
Achieving perfect spacing and alignment is crucial when creating personalized gift tags with the Letters, Numbers, & Symbols Clear Stamp Set, which features 86 individual stamps. These clear stamps allow for great precision, but without the right techniques, your project can easily veer off course. Utilizing tools designed to assist with alignment can make a significant difference in the final look of your tags.
Start by gathering supplies. A ruler or a grid guide will be your best friends when it comes to ensuring that each letter and symbol is stamped in straight lines and evenly spaced. Lay your gift tag flat, and use the ruler to draw light pencil lines which will serve as guidelines. These lines can be positioned to reflect the desired spacing between words, ensuring your text remains balanced and visually appealing. When positioning your clear stamps, take care to line them up with your guidelines before pressing down. This practice not only helps maintain even spacing but also allows you to easily reposition any stamps that may need slight adjustments. Always double-check alignment by standing back and assessing your work from a distance.
- Use a transparent ruler for easy visibility of your stamp placement.
- Consider practicing on scrap paper to perfect your spacing technique.
- Utilize the grid or ruler to space out symbols and letters evenly.
- Stamp slowly and press down evenly for consistent impressions.
Creating Layers
Creating layers in your personalized gift tags using the Letters, Numbers, & Symbols Clear Stamp Set can yield stunning results that truly stand out. Begin by laying the foundation of your tag with a base color of ink. Choose a lighter tone for an elegant backdrop, allowing for brighter colors to pop against it. This initial layer not only sets the mood but also serves as a canvas for your additional designs. Consider using larger stamps for the base layer, such as big bold numbers for birthday tags or oversized letters for names, as these will frame your design beautifully.
Once your base layer is dry, embark on layering additional designs over it. This is where creativity knows no bounds! Combine different stamps together, such as mixing letters and symbols for a unique greeting or decorative touch. Overlapping letters from the clear stamp set is an exciting way to add depth—experiment with varying orientations and placements. When selecting ink colors, go for complementary or contrasting shades; for example, a vibrant fuchsia over a soft gray can add energy to your tags. Remember to let each layer dry, or use a heat tool for quicker results. You can also add texture to your designs by incorporating smaller stamps as accents around the main elements.
- Use light colors first, then layer darker or bolder tones.
- Mix and match individual stamps for personalized messages.
- Consider using symbols to enhance visual interest.
- Allow each ink layer to dry fully before adding the next.
- Experiment with orientation for an artistic flair.
Adding Personal Touches
Creating personalized gift tags using the Letters, Numbers, & Symbols Clear Stamp Set opens up a world of creativity. Not only can you create unique messages, but you can also enhance the stamped designs with additional embellishments that reflect the recipient's personality or the occasion. Hand-drawn elements, stickers, and glitter can be powerful tools to make your gift tags stand out, and knowing how to balance these elements is key to preserving the integrity of your stamped designs.
Start by selecting a few standout colors that complement the stamped elements. A simple way to personalize your gift tags is by adding doodles or intricate borders around the edges. Use fine-tip markers to ensure these hand-drawn features do not detract from the clear lettering. Stickers can add fun visual cues—like small hearts, stars, or seasonal motifs—placed strategically alongside the text, ensuring they won't overshadow the stamped words. When it comes to glitter, consider using a minimal splash; a light sprinkle at the corners or around the edges can provide a touch of sparkle without overwhelming the design.
- Create stylish frames with your hand-drawn elements.
- Incorporate small, themed stickers that align with your gift's theme.
- Limit glitter to key areas to maintain a balanced look.
Setting and Drying
When using the Letters, Numbers, & Symbols Clear Stamp Set, allowing the ink to dry properly is essential for achieving pristine, personalized gift tags. After stamping your desired design, it’s crucial to set the ink effectively to prevent smudging or smear. To begin with, choose a flat, clean surface to work on, as uneven surfaces can increase the risk of accidentally disturbing your fresh designs.
Recommended drying time varies depending on the type of ink used, but generally, allowing the tags to dry for at least 30 minutes in a well-ventilated area helps. Ensure that the environment is free from drafts and direct sunlight, as these factors can cause the ink to dry too quickly, resulting in cracks or unevenness. To further prevent smudging while the tags are drying, consider these tips:
- Handle the tags only by the edges, avoiding any contact with stamped areas.
- If possible, use a heat gun on a low setting to gently speed up drying; maintain a safe distance to avoid damaging the paper.
- Place the tags apart from each other when drying to give each design enough air circulation.
- Instead of stacking the tags, use a drying rack or hang them to minimize contact.
Related Products


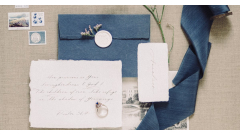
Assembling Gift Tags
Once you've stamped your design using the Letters, Numbers, & Symbols Clear Stamp Set, the next step is cutting and assembling your gift tags. Start by cutting your stamped cardstock into desired tag shapes. Square, rectangular, or even custom shapes can bring a unique flair to your gift presentation. A paper cutter ensures clean, straight edges, but scissors work well for a more casual, handcrafted vibe.
After cutting your tags, it's time to punch holes for the string or ribbon. Use a handheld hole punch for precision; position the hole about a quarter inch from the top, centered, to ensure stability. To add the string or ribbon, thread it through the hole, leaving enough length to tie a sturdy bow. Consider using twine for a rustic feel, or satin ribbon for elegance. Enhance your tags with additional touches such as embellishments, glitter, or washi tape along the edges for a pop of personality. The combination of your stamped message and these finishing details will give your gift tags a memorable finish.
- Use varied sizes for tags to create visual interest.
- Mix and match colors of string or ribbon, coordinating with your gift wrapping.
- Experiment with layering two tags for depth or using contrasting materials like fabric and paper.
Storage and Care
To maintain the quality of your Letters, Numbers, & Symbols Clear Stamp Set, storing them properly is essential. Clear stamps are sensitive and can be easily damaged or lose their stickiness if not cared for correctly. One effective way to store these stamps is to keep them in their original packaging or in a dedicated stamp binder with plastic sleeves. This not only protects them from dust and physical damage but also helps you keep them organized by category, making them easy to access for your personalized gift tag projects.
Cleaning your clear stamps after each use is crucial for longevity. Utilize a gentle soap and water solution or specialized stamp cleaners. After cleaning, lay your stamps flat on a clean, dry surface to air dry or gently pat them with a soft cloth. Avoid placing them in direct sunlight, as UV rays can degrade the material over time. For additional protection, consider storing them in a cool, dry location, away from extreme temperatures and humidity. This will help maintain their elasticity and adherence.
- Store stamps in their original packaging or a stamp binder for easy access and dust protection.
- Clean stamps after use with gentle soap and water or specialized stamp cleaners.
- Lay stamps flat to dry, avoiding direct sunlight to prevent material degradation.
- Keep in a cool, dry location, away from extreme temperatures.
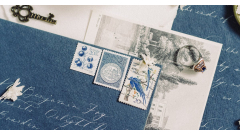
Creative Uses Beyond Tags
Unleash the versatility of the Letters, Numbers, & Symbols Clear Stamp Set (86 individual stamps) by incorporating it into various creative projects that go beyond the traditional gift tags. With a wide array of letters, numbers, and symbols at your disposal, these stamps can elevate any project into a unique masterpiece. Imagine transforming plain cards into personalized keepsakes by customizing them for every occasion. Simply choose your desired stamp and ink, positioning it on your card surface to create meaningful messages, names, or even dates to commemorate special moments. Experiment with layering and color combinations for a stunning visual effect that stands out.
You can also explore the delightful world of scrapbooking with this stamp set. Personalizing your scrapbook pages becomes an adventure when you can add names, dates, and captions effortlessly. Start by selecting a few key stamps to represent the themes of your photos or memories, stamping them on beautifully patterned paper. This not only enhances the aesthetics of your pages but also brings a personal touch that tells your story. Create customized labels for jars, storage boxes, or gifts to organize your spaces while keeping them stylish. Use the letters, numbers, and symbols to craft labels that indicate contents, dates, or even special messages. Just stamp your chosen text on adhesive label paper and cut them out for an instant upgrade to your organization efforts.
- Decorate Cards: Create personalized cards for birthdays, holidays, or any special event.
- Scrapbooking: Add letters and symbols to scrapbook pages for dimensions and personalization.
- Customized Labels: Design labels for storage or gifts, bringing style and organization to your space.
- Party Invitations: Use the stamps to create unique invites that reflect your theme.
- Decorative Banners: Craft fun and personalized banners for celebrations or home décor.
Why We Chose This Product
Choosing to create personalized gift tags with clear stamps allows for boundless creativity and individual expression. This guide highlights a remarkable way to enhance your gift-giving experience, turning every present into something truly special with just a bit of effort. With the Letters, Numbers, & Symbols Clear Stamp Set, you can easily customize your tags to suit any occasion, making them not just a decoration but a meaningful part of the gift itself.
- Easy to use for all skill levels
- Versatile designs for any occasion
- Perfect for adding a personal touch
We selected this product because it inspires creativity and enhances the joy of gifting. By employing this stamp set, you not only make your gifts more memorable but also enjoy the process of crafting something uniquely yours. Dive into the world of personalized tagging and make every gift unforgettable!
The Letters, Numbers, & Symbols Clear Stamp Set is a fantastic collection of 86 individual stamps that lets you personalize your creations with ease. Whether you want to spell out a name, add a playful date, or include fun symbols, this set offers an array of options to elevate your crafting. Ideal for gift tags, scrapbooking, or any paper project, these clear stamps are user-friendly and perfect for crafters of all levels. Let your imagination run wild as you create stunning and heartfelt designs that capture the essence of your gifts.