Welcome to the wonderful world of customizing invitations! Using clear stamps opens up endless possibilities for expressing your unique style and creativity. Whether you're preparing for a wedding, a birthday party, or a baby shower, personalizing your invitations adds that special touch that makes your event memorable.
This How to Guide will steer you through the exciting process of using the Letters, Numbers, & Symbols Clear Stamp Set. With 86 individual stamps at your disposal, you'll learn how to arrange and apply these designs easily, transforming simple paper into stunning invitations that reflect your personality.

Introducing the Letters, Numbers, & Symbols Clear Stamp Set, a must-have tool for anyone looking to elevate their crafting game. With 86 individual stamps, this set makes it easy to customize everything from invitations to scrapbook pages. The clear design allows for precise placement, helping you create designs that truly stand out. Perfect for any event or occasion, these stamps provide the flexibility and creativity needed to express your personal style in every project.
Choosing Your Invitation Style
When it comes to customizing invitations using the Letters, Numbers, & Symbols Clear Stamp Set, selecting an invitation style that aligns with your event's theme is crucial for making a lasting impression. Start by identifying the general vibe of your event – whether it's formal, casual, whimsical, or even themed around a specific concept. Each style not only conveys a different sentiment but also dictates the colors and design elements that will best enhance the visual appeal of your invitations.
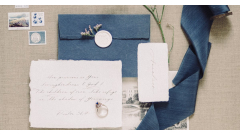
For a formal event, consider using elegant fonts and rich colors like navy, burgundy, or gold. Pair these colors with classic design elements such as borders or floral accents. The clear stamps in your set can be used to create refined monograms or sophisticated embellishments. In contrast, if your event is more casual, opt for playful colors like pastels or bright patterns, adding fun elements like balloons or confetti stamps for a lively feel. For a whimsical theme, embrace the unexpected—think glittery colors, quirky shapes, and imaginative designs, using the clear stamps to add quirky quotes or playful symbols that resonate with the theme.
- Formal: Rich color palettes, elegant fonts, classic design elements.
- Casual: Playful colors, fun accents, and light-hearted stamps.
- Whimsical: Glittery colors, quirky designs, and imaginative embellishments.
Planning Your Layout
Creating customized invitations using the Letters, Numbers, & Symbols Clear Stamp Set opens a world of creative possibilities. The first step in your design journey is sketching a rough layout that will help you visualize the invitation's overall appearance. Start with a blank canvas on paper or digitally, and consider the size of the invitation you are creating—typical dimensions are either A5 or A6. Once you have decided this, layout the invitation in a way that balances text and imagery effectively.
When determining where to place text and images, contemplate these components:
- Envision a focal point—this could be a prominent image or main text that draws attention.
- Arrange your stamps thoughtfully; for instance, if you are using numbers for a date, ensure they stand out with ample white space around them.
- Consider a hierarchy for your text. Bigger fonts (like names or headings) should be placed first, while smaller details (like dates or locations) can be positioned below.
- Provide sufficient margins around the edges to avoid crowding. Aim for at least a quarter-inch space to ensure each element breathes.
- Incorporate visual balance by mirroring elements—if you have a large image on one side, place a block of text of similar visual weight on the opposite side.
Making room for stamping is essential; test areas with stamps in your layout sketch to see how they fit within the available space. This approach helps identify any design adjustments needed before finalizing your layout, allowing you to play with configurations and ensure everything aligns beautifully.
- Don’t hesitate to outline potential color schemes or themes directly on your sketch to maintain clarity in your vision.
- Use different stamp sizes to create variations in your design, guiding the eye across your layout effectively.
Selecting Stamps
Choosing the right letters, numbers, and symbols from the Letters, Numbers, & Symbols Clear Stamp Set (86 individual stamps) for your invitations is an exciting part of the creative process. Begin by considering the theme of your event. A whimsical birthday party might benefit from playful, rounded letters, while an elegant wedding could call for sophisticated script styles. Take note of the size of your stamps; larger letters make a bold impact, whereas smaller ones can add delicate detail. Think about the tone you want to convey, as the font style will significantly influence the overall design.
Once you have a sense of your event's theme and tone, explore how to mix and match characters. When creating personalized messages, consider pairing uppercase letters for the names with lowercase letters for additional text. Using numbers from the set, you might include the date of the event, ensuring that they complement the font choices. Incorporating symbols — such as hearts for weddings or stars for birthday parties — can enhance your design further. Keep the following points in mind as you select your stamps:
- Choose fonts that fit the event’s mood.
- Consider the size of letters and how they fit on your invitation.
- Combine different styles for visual interest.
- Mix letters and numbers for dates and special messages.
- Add symbols to elevate your design and personalize it further.
Choosing Ink and Paper
When customizing invitations using the Letters, Numbers, & Symbols Clear Stamp Set, selecting the right ink and paper is crucial for achieving beautiful, crisp impressions. This stamp set features 86 individual stamps, including alphabets, numbers, and various symbols, allowing for creative flexibility in your designs. Begin by considering the type of paper you’ll be using. For projects that require vibrant ink application, smooth cardstock is ideal. Look for paper weights between 80 lb and 110 lb to prevent ink bleed-through, especially when using more fluid inks.
Selecting the appropriate ink can enhance or detract from your stamping project. Pigment inks provide rich, opaque colors and are perfect for detailed designs, giving you a bold impression on lighter and darker papers. Alternatively, dye inks dry quickly and are great for layering techniques, although they may require a little more practice to avoid blurring. Always test your combination on a scrap piece of paper before committing to your invitations.
- Consider using archival inks for longevity, particularly for items that will be kept as keepsakes.
- Experiment with various colors to find the perfect contrast against your chosen paper.
- For intricate designs, a fine-tip ink pad is beneficial for capturing all details.
- Use a stamp positioner for consistent placement of your designs.
Preparing Your Stamps
Customizing invitations using the Letters, Numbers, & Symbols Clear Stamp Set requires some essential preparation steps to ensure a flawless stamping experience. Begin by cleaning your clear stamps to remove any residues from manufacturing or handling. Use a gentle, non-alcoholic cleaner, such as warm soapy water or a specialized stamp cleaner. Soak a lint-free cloth or paper towel with the cleaner and gently wipe each stamp, paying close attention to the edges and corners. This action will eliminate any grime or oil, ensuring that the ink sticks well during your crafting session.
After cleaning your stamps, condition them for optimal ink adherence. Start by inking the stamp lightly with your chosen ink pad and making a few test impressions on scrap paper. This step helps the ink distribute evenly and achieve crisp results. If you notice that the ink isn’t adhering well, gently rub the stamp’s surface with an eraser or a fine grit sandpaper to create a better texture for the ink to cling to. Remember to clean the stamps again after conditioning to remove any excess ink before you begin your actual project.
- Use a soft brush or toothbrush to reach into detailed areas.
- Always ensure stamps are thoroughly dried before applying ink.
- Regular maintenance increases the longevity of your clear stamps.
Stamping Techniques
Creating customized invitations using the Letters, Numbers, & Symbols Clear Stamp Set opens a world of creative possibilities. The first technique to explore is layering. Layering involves stamping one image over another to create depth and intricacy. Begin by selecting a base stamp from your set, such as a decorative letter or number. Choose a contrasting ink color for the overlay to enhance visibility. Position your stamp about half an inch above the base stamp, gently press down to ensure an even transfer of ink, and lift straight up. This height adjustment gives a shadow effect, adding dimension to your invitations.
Repeating patterns is another captivating stamping technique. To achieve a seamless pattern, choose several individual stamps within the set and plan a layout. Use a light pencil to lightly sketch a grid where each stamp will go. Start from one corner and stamp your first letter or symbol. Move systematically across the grid, ensuring even spacing. For added flair, consider using different ink colors for each stamp in your pattern. Finally, coloring in designs can bring your invitations to life. Use water-based markers or colored pencils to enhance specific letters or symbols within your stamps. This technique allows for personal touches, creating a charming, hand-crafted appeal.
- Layer different colors for greater depth.
- Experiment with various combinations of symbols and numbers.
- Use a MISTI tool for precise alignment when layering.
- Try using pigment inks for brighter, bolder colors.
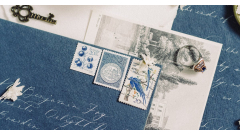
Incorporating Embellishments
Enhancing your invitations using the Letters, Numbers, & Symbols Clear Stamp Set can add a personal touch that your guests will adore. One effective way to amplify the charm of your stamped designs is to incorporate various embellishments like ribbons, sequins, or washi tape. For instance, after stamping your invitation details in vibrant ink, consider using a delicate ribbon to create a bow at the top or side of the card. Choose a color that complements your design, ensuring it enhances rather than distracts from the stamped imagery. When applying the ribbon, secure it with adhesive or double-sided tape, making sure it is positioned in a way that showcases your main stamped elements.
Sequins provide an excellent opportunity to add a bit of sparkle and depth to your invitations. Scatter a few sequins around the stamped area, or create clusters near important text, such as the date or the names of the hosts. To keep the sequins in place, use a strong adhesive, which will ensure they stay put during handling and mailing. Similarly, washi tape offers a versatile decorating option. It can be used to frame your invitations or serve as playful separators for different sections of text. Select a washi tape that matches the color palette of your stamped designs, and simply tear or cut it to size and adhere it where you see fit. This combination of stamped designs and embellishments can create a truly unique and visually appealing invitation.
- Choose a ribbon that matches your color scheme for added cohesiveness.
- Use sequins to draw attention to key details on your invitations.
- Washi tape can add a fun and colorful border to your design.
Related Products


Final Assembly Steps
Once your invitations are beautifully stamped and embellished using the Letters, Numbers, & Symbols Clear Stamp Set, it's time to move on to the final assembly steps. Begin by gathering all your components: the main invitation card, any additional layers or inserts, and envelopes. Arrange these pieces in front of you to ensure a smooth workflow. Ensure that any layers are trimmed to the same dimensions, creating a consistent and polished appearance. For best results, use a paper trimmer for precise cuts, which can enhance the overall presentation.
Your stamping work should be the centerpiece, so pay attention to positioning when layering. Align the edges of your invitation cards and any decorative elements you have added, such as ribbons or embellishments. Place them flat on a clean surface. Use a ruler or a straight edge to lightly mark alignment spots on your cards when adding layers - this will help prevent any misalignment at the final moment. Start adhering your layers from the bottom up, pressing down firmly but gently to prevent wrinkling.
- Double-check the placement of stamped designs and embellishments before adhering anything permanently.
- Utilize a good quality adhesive, such as double-sided tape or glue dots, for a secure and lasting hold.
- If you're adding embellishments, consider using foam tape to create dimension and visual interest without adding extra bulk.
Personalizing Each Invitation
When it comes to customizing your invitations using the Letters, Numbers, & Symbols Clear Stamp Set, there are countless creative pathways to explore. With 86 individual stamps at your disposal, you can effortlessly craft unique messages and enhance each invitation to truly reflect your style and personality. Start by selecting the colors of ink that resonate with your theme; consider using complementary shades for a visually striking effect. This approach not only brings your distinctive flair into play but also elevates the overall aesthetic of your invitations.
Once you've stamped the foundational elements on your invitations, take personalization a step further by incorporating handwritten notes. A simple, heartfelt message in your own handwriting adds a warm touch. You might even opt for a colored gel pen that matches the ink used in your stamping. Additionally, addressing envelopes creatively can make your invitations feel more special. Consider using different font styles or sizes from the stamp set for each envelope, or embellishing with small doodles alongside your stamped address. A textured background or patterned envelope liner can also enhance the personalized touch, ensuring each recipient feels valued and unique.
- Explore combinations of letters, numbers, and symbols to create custom phrases that resonate.
- Utilize different ink pads to achieve a layered look and varied textures.
- Experiment with the arrangement of stamps to craft visually appealing designs.
Testing and Adjusting Designs
When you're customizing invitations using the Letters, Numbers, & Symbols Clear Stamp Set, taking the time to test out your designs before the final assembly can significantly elevate your project. Begin by selecting a few key stamps from the set, which includes 86 individual stamps, to draft your invitation layout. Utilizing scrap paper or a less expensive cardstock for testing will allow you to experiment freely without worrying about wasting your best materials. Once you have your stamps selected, try different configurations and placements on your test invitation. This initial stage is vital for visualizing how the elements will interact and how much space will be required for each component.
After you've stamped your initial designs, it's essential to assess the overall look and feel of your invitation. Check for aspects such as alignment, spacing, and ink saturation to ensure everything appears balanced and visually appealing. Adjustments may be necessary, so consider the following:
- If the stamps look crowded, try moving some elements further apart.
- Experiment with different ink colors to see what enhances the overall design.
- Use embellishments sparingly to avoid overwhelming your design; test how adding small details like gems or ribbons look.
By iteratively testing and refining your design, you can achieve a polished result that perfectly suits your needs without the stress of last-minute adjustments during the final assembly.
- Document your successful placements as a reference for your final invites.
- Don't hesitate to try out various combinations of stamps to find the best fit for your theme.
Why We Chose This Product
Choosing the Letters, Numbers, & Symbols Clear Stamp Set to feature in this guide was a no-brainer. This versatile collection enhances your creative repertoire while promoting fun and satisfaction with each stamped creation. Your invitations will not only look professional but will truly resonate with the essence of your special event.
- Encourages creativity and customization
- Perfect for any occasion and style
- Easy to use for all skill levels
- Comes with a variety of designs to choose from
With this stamp set, you can easily create one-of-a-kind invitations that wow your guests. Dive in, unleash your imagination, and make those invitations as unique as the celebration itself!
Introducing the Letters, Numbers, & Symbols Clear Stamp Set, a must-have tool for anyone looking to elevate their crafting game. With 86 individual stamps, this set makes it easy to customize everything from invitations to scrapbook pages. The clear design allows for precise placement, helping you create designs that truly stand out. Perfect for any event or occasion, these stamps provide the flexibility and creativity needed to express your personal style in every project.