Welcome to the vibrant world of polymer clay, where creativity knows no bounds! This guide is your key to unlocking the magical realm of incorporating inks into your clay projects, turning ordinary pieces into extraordinary works of art. Get ready to discover innovative techniques that will elevate your crafting game, giving you the confidence to experiment and explore the vivid possibilities that inks offer.
As you dive into this exciting journey, you’ll learn how to blend colors, create stunning textures, and add intricate designs that are bound to impress. Whether you’re a seasoned artist or just starting out, this guide will empower you with all the knowledge and inspiration you need to infuse your polymer clay creations with your unique artistic flair.

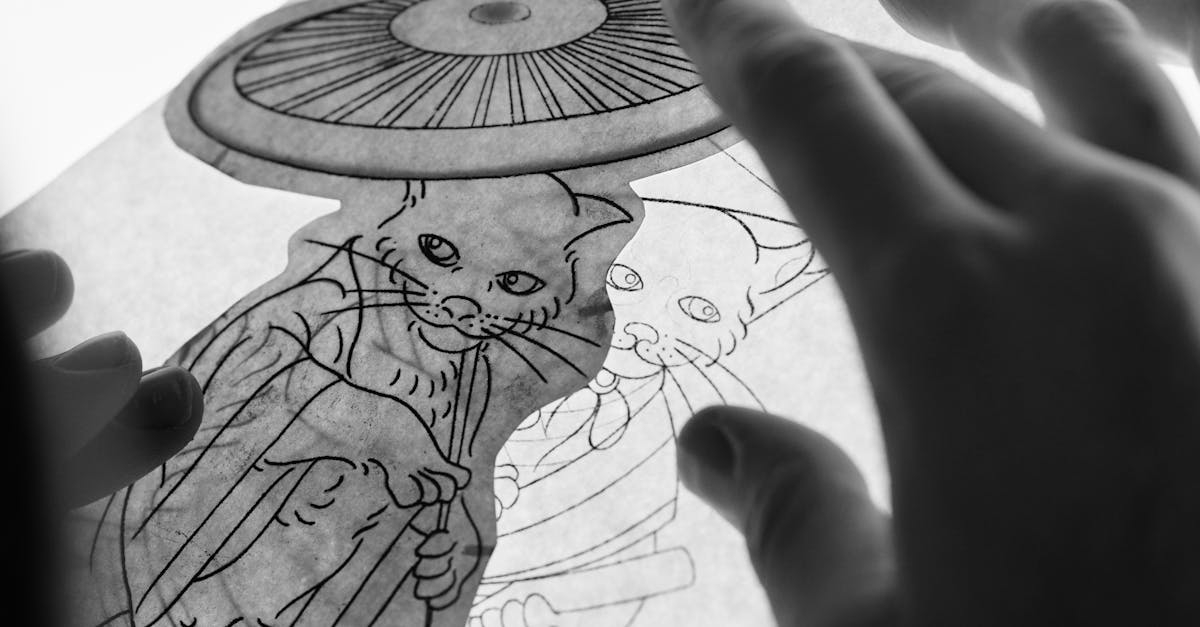
The Art of Polymer Clay Creative Surface Effects is an essential resource for artists and crafters passionate about enhancing their work with various media. This comprehensive guide covers an array of techniques involving transfers, stamps, stencils, ink, paints, and other mediums. With a focus on innovation and creativity, it inspires readers to explore new possibilities and styles in their polymer clay projects, facilitating the creation of unique and captivating art pieces.
Choosing the Right Inks
When it comes to incorporating inks into your polymer clay projects, selecting the appropriate ink is crucial for achieving the desired effects. Various types of inks can enhance your creations, but their permanence, transparency, and interactions with clay should guide your choices. For instance, alcohol inks, such as Ranger's Alcohol Inks, are renowned for their vibrant colors and rapid drying time. These inks are alcohol-based, making them ideal for creating beautiful marbling effects when applied to non-baked clay. Their transparency allows for layering, adding depth to your designs without obscuring underlying patterns. It's essential to understand that alcohol inks can remain somewhat tacky unless properly sealed, so consider a compatible varnish after curing your project.
Dye inks, such as those from Tsukineko's Memento line, are another excellent option. They offer a wide spectrum of colors, and their quick-drying nature makes them perfect for stamped impressions on baked clay surfaces. With a water-based formula, dye inks can blend seamlessly into your art but may require a protective layer to ensure their longevity on polymer clay. Test various inks on scrap pieces of clay before committing to your final design. Some tips for testing include:
- Apply a small amount of ink to a scrap piece and observe the drying time.
- Add layers to see how they blend together, defining your color palette.
- Use clear sealers on tests post-curing to evaluate how well the ink holds up.
Finally, solvent-based inks, including StazOn, provide durability and rich color saturation. These inks are designed to adhere well to non-porous surfaces, making them an excellent choice for polymer clay projects that require strong pigmentation. They dry quickly, but like alcohol inks, they may not cure completely unless sealed. When selecting inks for your polymer clay, understanding these properties can make a significant difference in the quality of your work.
- Consider the surface and finish of your clay piece when choosing inks.
- Experiment with different application methods, such as sponging or airbrushing.
- Keep in mind the curing process of your polymer clay and how it will interact with the ink.
Preparing the Clay Surface
To effectively incorporate inks into your polymer clay projects, the preparation of the clay surface is crucial. Begin by ensuring that your polymer clay, such as Sculpey or Fimo, is properly conditioned. Knead the clay until it reaches a uniform consistency and pliability. This step helps to remove air bubbles and prepare the clay structure for any surface treatments you plan to apply. Once conditioned, roll the clay out to your desired thickness, keeping in mind that a smoother surface will typically enhance ink adhesion.
Next, focus on cleaning the surface thoroughly. Dust, oils from your hands, and other particles can hinder the adherence of ink. Use a soft brush or a cloth to gently wipe the surface clean. For stubborn residues, a light wash with mild soap and water can be effective, but ensure the clay dries completely before proceeding. Curing the clay is another essential step; follow the manufacturer's instructions for temperature and time. Always cure your polymer clay properly, as improperly cured clay can lead to issues with ink application. When applying ink, remember that surface texture significantly affects the final look. A textured surface can create depth and dimension, while a smooth surface can yield a cleaner, more vivid ink application.
- Ensure your polymer clay is well-conditioned
- Use a soft brush or cloth for cleaning
- Allow thoroughly drying before applying ink
- Cure your clay according to the manufacturer’s instructions
- Consider surface texture for ink adhesion
Applying Inks Techniques
Integrating inks into polymer clay projects opens up a plethora of creative possibilities. Techniques such as sponging, brushing, and spraying are especially effective for achieving unique surface effects. Each method requires specific tools and approaches to maximize your creative expression, giving you the flexibility to explore different finishes and textures.
When sponging inks, you will need a high-density foam sponge or sponge applicator. This technique can produce soft, blended edges and textured surfaces. Here’s how to do it:
- Choose a palette of inks. Alcohol inks or dye-based inks work best for vibrant colors.
- Prepare your polymer clay by conditioning it to ensure a smooth surface.
- Use the sponge to dab your chosen ink onto the clay, starting from the edges and working inward for a gradual effect.
- Layer different colors for depth, allowing each layer to dry before applying the next.
For brushing techniques, a variety of brushes can be utilized, including round, flat, or fan brushes. This approach allows for more controlled application, perfect for detailed designs or gradients:
- Select inks that are highly blendable. Waterbased inks can be thinned for better flow.
- Begin with a clean, dry brush dipped lightly into the ink.
- Apply the ink with long, even strokes for a smooth coat, or use short, brisk strokes for a textured look.
- Experiment by mixing colors directly on the clay or on a palette for more intricate results.
Spraying inks is another dynamic method, ideal for achieving an airbrushed effect or vibrant splatters. To do this, you’ll need a spray bottle, an airbrush kit, or even canned air designed for applying inks:
- For spray bottles, dilute your ink with water to achieve a fine mist.
- Maintain a distance of approximately 12 inches from the clay surface to prevent heavy pooling.
- Move the spray bottle in a sweeping motion for an even coverage.
- Layer colors by allowing each spray layer to dry, enabling you to achieve rich and unique blend effects.
Safety considerations are paramount when working with inks and polymer clay. Always wear gloves to avoid direct skin contact with the inks, and ensure that your workspace is well-ventilated, especially when spraying. Clean your tools thoroughly after each use to maintain their integrity and prevent color contamination.
Each technique fosters a different aspect of creativity and expression. So gather your materials and explore the extensive range of possibilities that inks offer in transforming your polymer clay projects.
Creating Layered Effects
When working with inks in your polymer clay projects from "The Art of Polymer Clay Creative Surface Effects," layering multiple colors can infuse your creations with extraordinary depth and dimension. Start with a well-conditioned slab of polymer clay as your base. Choose your ink colors wisely; vibrant shades will stand out against neutral tones, while darker hues can create a dramatic backdrop. Begin by applying your base ink color evenly across the surface using a soft brush or sponge. This initial layer provides a foundation for the subsequent colors. Make sure to let this layer air dry or lightly cure it according to the manufacturer's instructions before moving to the next step, as this ensures that the colors adhere properly without blending into one another.
Once your first layer is set, choose a contrasting ink color and lightly apply it using a stenciling technique or by sponging it on with a different tool for varied effects. Since inks can have varying levels of transparency, remember that the intensity of the second layer may change based on how dry the first layer is. Allow each application to dry completely, as this minimizes the risk of smudging and allows the colors to interact beautifully. If you desire a more transparent effect, consider diluting your ink slightly with a mixing medium that won’t affect the polymer's integrity. Repeat the process by adding additional layers, creating a stunning visual texture in your piece as you masterfully build up your colors.
- Use contrasting colors for better visibility.
- Lightly cure between layers for optimal adherence.
- Experiment with dilution for unique transparency effects.
Using Stencils with Inks
Utilizing stencils in polymer clay projects can create stunning designs, especially when paired with various inks. Selecting the right stencil is the first step; opt for durable materials like mylar or acetate, which will hold up against inking. Look for a design that complements your project, whether it’s a geometric pattern or a floral motif, ensuring it’s not too intricate, as fine details can be lost in the process. Positioning the stencil properly is crucial. Use removable adhesive spray or washi tape to secure the stencil onto your polymer clay surface. This prevents shifting and allows for a crisp print. If you're working with softer, more textured clay surfaces, a gentle hand when securing the stencil will minimize any deformation.
To prevent ink bleed and achieve a clean finish, certain methods can make a significant difference. Applying a thin layer of translucent clay under the stencil can provide a barrier between the ink and the clay, reducing bleeding. Additionally, using a foam brush or a dauber with a gentle tapping motion rather than dragging the ink across the stencil promotes precise application. When choosing inks, solvent-based inks offer vibrant colors and permanence, perfect for polymer clay projects. After the ink application, allow it to dry before removing the stencil to avoid smudging. Consider sealing the design with a polymer clay safe gloss or matte finish for longevity. Here are some key tips to remember:
- Choose high-quality, sturdy stencils for durability.
- Utilize adhesive sprays or tape to secure stencils effectively.
- Apply a thin layer of translucent clay to prevent ink bleed.
- Use gentle tapping motions with your applicator for precise ink application.
Incorporating Mixed Media
Incorporating inks into polymer clay projects opens a world of creative possibilities that amplify texture, depth, and visual interest. Using products such as alcohol inks and pigment inks can transform a simple polymer clay piece into a multi-dimensional masterpiece. These inks can be layered in combination with other mediums like acrylic paints, metallic paints, or mediums designed to add sheen or texture. To start, choose your base color of polymer clay, knead it well, and shape it into your desired form.
Once your clay piece is shaped and baked, prepare your inks and additional mixed media products. Here’s a guide to layering:
- **Base Layer**: Apply a base layer of acrylic paint or metallic paint on the baked polymer clay. This helps create a rich backdrop for the inks.
- **Inking Technique**: Use a brush or felt applicator to apply alcohol inks. Allow each layer to dry completely before adding the next. Alcohol inks are known for their vibrant colors and transparency, allowing the underlying layers to shine through.
- **Layering Inks**: Use different shades or contrasting colors of ink over the base layer for depth. Experiment with blending colors while still wet for a marbled effect.
- **Add Texture**: Once the inks are set, consider adding a clear gloss varnish or a medium to seal everything in place. This varnish not only protects your work but can also add an additional layer of gloss or matte finish depending on what you choose.
Remember that experimenting with different combinations of inks and paints will yield unique results every time, so embrace the unexpected.
- **Final Touches**: Use stamps or stencils after the inking process to add intricate details, enhancing the overall design.
- **Interactive Surface**: Consider using mica powders for an iridescent finish, which adds luxury and depth when sprinkled on top of wet inks.
- **Finishing Products**: Incorporate resin or varnish to seal in your artwork, providing durability and vibrancy to the colors.
Protecting Inked Surfaces
To ensure the longevity and vibrancy of your inked polymer clay projects, it is essential to apply proper sealants that protect the ink from smudging or damage. There are various sealant options designed specifically for polyclay surfaces, each offering unique benefits. Among the most popular sealants are water-based varnishes, spray sealants, and specially formulated polymer clay sealers.
Water-based varnishes, such as those made by Polycrylic and Mod Podge, are versatile choices as they dry clear and provide a durable finish. When applying varnish, use a soft brush for an even coat, allowing for careful control. Spray sealants like Krylon and Rustoleum can cover larger areas quickly, but it's vital to spray from a distance to avoid pooling or drips. Always follow the recommended drying times—generally about 24 hours for varnishes and just a couple of hours for sprays—to ensure a fully cured, smudge-proof finish.
- Choose a sealant compatible with inks used; for instance, alcohol inks often require different treatments than dye-based inks.
- Before sealing, test your chosen sealant on a small, inconspicuous area to ensure compatibility and avoid unexpected reactions.
- Apply the sealant in a dust-free environment to minimize any particles that can settle onto the surface.
- Maintain consistent brush strokes or spray patterns to avoid uneven texture in your coated surface.
- Ensure your project is completely dry before sealing; even small amounts of moisture can lead to smudging.
- Consider using a soft cloth or sponge for cleanup to avoid scratching the inked surface.
Related Products


Troubleshooting Ink Issues
Working with inks on polymer clay can lead to some frustrating moments if issues arise. Common problems like smudging, fading, or uneven application can detract from your creative vision. To combat smudging, ensure that your polymer clay surface is fully cured and clean. Before applying any ink, wipe the area with rubbing alcohol to remove any oils or dust. When using liquid inks, opt for a fine-tipped applicator to achieve precision; this will help in preventing bulk application that can lead to messy edges. If smudging occurs after application, allow the ink to dry completely before handling the piece. Using a heat gun can speed up drying time significantly—just be careful not to overheat the clay itself.
Fading may happen when high-quality inks are not used or when the piece is exposed to excessive sunlight. To mitigate this, always use lightfast inks specifically designed for permanence, and apply a clear sealant like varnish or resin after the ink has dried, to lock in color vibrancy. If the ink appears uneven, consider your application method. Using a soft sponge or a brush can help to achieve a more consistent layer. Avoid heavier layers of ink, as they are prone to pooling and uneven spots. Here are additional tips for improving your results:
- Experiment with different types and brands of ink until you find one that suits your style.
- Test your inks on a small piece of scrap polymer clay before applying them to your main project.
- Work in a well-ventilated area to facilitate even drying.
- Store your inks properly to maintain their qualities for a longer period.
Creative Project Ideas
Incorporating inks into polymer clay projects is a fantastic way to enhance creativity and add depth to your designs. Utilizing inks opens up a world of possibilities, and here are some imaginative project ideas to inspire your next crafting session.
- Customized Jewelry: Create stunning necklaces and earrings using polymer clay bases painted with alcohol inks. Materials needed: polymer clay, alcohol inks, jewelry findings, and a sealer. Start by molding your polymer clay into desired shapes. Once baked and cooled, use a paintbrush to apply the alcohol inks for vibrant hues and patterns. Seal your pieces with a varnish to ensure longevity. Assemble your jewelry by attaching findings like earring hooks or necklace chains.
- Decorative Home Décor Items: Design unique coasters or wall art using inks and stencils. Supplies needed: polymer clay, acrylic paint, stencils, and inks. Roll out polymer clay to your preferred thickness and cut into squares for coasters or shapes for wall art. Apply stencils and use inks or paints to add designs. Bake as per instructions and finish with a coat of sealant to protect your surfaces.
- Functional Items: Make personalized keychains or magnets featuring vibrant ink designs. Required materials: polymer clay, alcohol inks, keychain hardware, or magnet backings. Shape your polymer clay, then use a variety of inks to create eye-catching patterns. After baking, attach hardware or magnets and allow to dry completely. These functional items can serve as great gifts or fun additions to your daily routines.
Exploring these project ideas can lead to delightful surprises, allowing for experimentation with different techniques. Mixing inks with polymer clay can yield stunning results as you discover the potential of color and texture combined.
- Artistic Cards: Utilize polymer clay and inks to make textured greeting cards. Ingredients: card stock, polymer clay, and inks. Roll out a polymer clay sheet, apply ink, and use stamps for designs. Once completed, adhere to the card stock.
- Personalized Key Holders: Create wall-mounted key organizers using painted polymer clay. Materials needed: polymer clay, hooks, and inks. Bend clay into desired shapes and decorate with inks before attaching hooks.
Cleaning and Maintenance
When working with inks in your polymer clay projects, proper cleaning and maintenance are crucial for ensuring the best results and prolonging the life of your tools and surfaces. It's essential to clean up promptly after using inks, as they can stain and become more challenging to remove if allowed to dry. Begin by gathering materials designed for cleaning ink and polymer clay, such as baby wipes, rubbing alcohol, or a mild detergent mixed with water. Utilize these materials to wipe down your work surfaces thoroughly. Avoid using harsh chemicals that can damage the polymer clay or alter its properties.
Maintain your tools—such as brushes, stamps, and stencils—by cleaning them immediately after use. Rinse brushes in soapy water, ensuring all ink is removed from the bristles. For stamps, a gentle rub with a baby wipe can often do the trick, but a soak in a soapy water solution followed by a rinse can ensure they remain ink-free. To preserve the vibrancy of inks applied to polymer clay surfaces, consider sealing your finished projects with a clear varnish or glaze, which will protect the colors and increase durability. Store your inks in a cool, dry place, and keep your work surfaces free of dust and debris.
- Use baby wipes or a soft cloth with rubbing alcohol for instant cleanup.
- Soak tools in warm, soapy water for effective cleaning.
- Seal completed projects to protect colors from fading.
- Regularly inspect your work surfaces for any residue to maintain cleanliness.
Why We Chose This Product
We chose to focus on the incorporation of inks into polymer clay because of their ability to transform your projects from simple to sublime. This guide highlights essential techniques that can truly enhance your artwork, enabling you to express your ideas in a visually stunning way. Inks not only add color but can also introduce depth and texture, making every piece a cherished masterpiece.
- Versatile application techniques
- Unique texture creation
- Vibrant color integration
- Easy blending methods
By showcasing this approach, we hope to inspire you to experiment and find your personal style within this dynamic craft. Let your imagination run wild, and watch your creations come to life with the simple addition of inks!
The Art of Polymer Clay Creative Surface Effects is an essential resource for artists and crafters passionate about enhancing their work with various media. This comprehensive guide covers an array of techniques involving transfers, stamps, stencils, ink, paints, and other mediums. With a focus on innovation and creativity, it inspires readers to explore new possibilities and styles in their polymer clay projects, facilitating the creation of unique and captivating art pieces.